DIY Light Table
I joined our preschool board of directors last May and it has been a blast helping get the preschool equipped with awesome learning tools. Our preschool was in need of some upgrades and less "day care" items! We have built new lockers gotten new toys and teaching supplies and have even made some of our own to save some money!! (like our 3 way art easel)
Our inspiration
Our easel!
(The president, Trina, my husband and I made the easel during the summer last year... it was another "we can make that" moment while looking through over priced education catalogs) Because we donated the cost of the project the preschool didn't pay a dime, we saved over $100 making our own and it was so easy!
The preschool uses it every day so its priceless!
I enjoy "window" shopping through the new education store catalogs that come in and I noticed some different light tables. I have thought our preschool was in need of one after visiting the Telus Spark Science Centre. They are SO expensive!! These two basic tables that are smaller than what we built are OVER $400 CND each. (both from wintergreen.ca)


My mom had one made for her back when my sister and I were young for drawing. I knew it was possible to make our own, just needed some inspiration. Off to Pinterest I went... I found everything from train tables converted to frosted Rubbermaid containers used as light tables. I got an idea of what I wanted, started looking at IKEA and what I could convert. I thought if I could convert a cheaper piece of furniture it would save the cost of supplies. So after some planning and sharing my idea with my husband we both started to get excited. My husband got possibly more excited than I was to build one and was thrilled to come up with something that would work. We decided to get enough supplies to build our little preschool a light table and to build our kids one too. We walked though IKEA saying to each other, "This would work" to more than a few different options. But we finally decided on the following:
What you need:
- LATT children's table and chairs. ($24.99 CND and it comes with 2 chairs!)
- Two sets of the DIODER LED lights. We got two in white ($29.99 CND each) for the Preschool's table and two sets in color ($39.99 CND each) because my husband got a brilliant idea to make our's a color table.
- After the IKEA run we stopped by Home Depot to get some OPTIX Acrylic sheets, you need exactly an 18"x 24" sheet. we got the .080" ($13.99 CND each) thickness but would suggest thicker if we did it again.
- Rust-Oleum Frosted Glass Finish spray paint ($7.97)
Extras:
- knife blade to notch out corners or table saw (be careful not to chip Acrylic)
- Screw Driver (or drill) and 4 small screws
- Velcro if desired
Lets get started!!!
(these instructions slightly vary from the solid white LED as for these photos we used the color sets. The only difference is the remote so there are a couple extra wires.)
You need the table pieces (if your LATT table comes with the support beams for the top you do not need these, one of our tables did not have these one did so you may end up with extra pieces you wont use, you may not)
Step 1: use the white table top to mark on your acrylic sheet the corners that need to be notched out. Then spray several thin coats of frosted finish paint over the acrylic. The more layers you apply the better. Only frost one side as well. One can worked perfectly for 2 tables!
The Lights...
This is all you get in one of the multi-color LED sets, you wont use all the pieces!
This is all you need for cords out of the two sets.
You will use all the LED light strips (8), the mini expansion strips (photographed in the project) and the following in the above photo as well as the adhesive strips and clamp pieces.
Step 2: Screw all clamp pieces near the bottom of each wide section. On the two smaller sections (not attached to the legs) slightly stagger the clamps because we need to over lap the LED strips on the small ends. They may be hard to see but if you look closely they are slightly staggered. We only did two clamps per wide board and it is plenty! You can always tack down the lights and cords with the little glue strips included in the kit if they are not laying nicely.
Step 3: Once the clamps are attached with the mini screws provided in the LED kits you will want to insert the Acrylic sheet where the white board provided for the table would go. This is already notched out on each board and should slide in perfectly. This is why we notched the corners out.
Step 4: Assemble the table.
Step 5: Insert the lights into the clamps
This is how we connected our lights: We connected 2 strips directly to each other, one extension, one strip, two extensions and then the final strip. Make two of these.
Connect the two strips that are directly together along the long edges and the first extension will go around the corner, then the other two strips will clamp in over lapping each other (that is why it is important to stagger the clamps on the short ends)
Do this to the other side as well.
Step 6: add the wires that connect the LED lights to the base adapter. We plugged them in and ran them both on the same side near the legs.
Step 7: place the "what is meant to be the top of the table" to the bottom right side down as shown in photo.
Step 8: Apply 4 screws at a slight angle to secure the bottom plate to the table. We attached 2 screws on each long end of the table. Be careful not to go through the edge of the table and expose the point of the screw.
You can brad nail this down but we chose screws just in case anything needs to be adjusted or lights need to be changed. We also didn't tighten the bottom near cords so we didn't pinch anything.
Step 9: Attach cords and adapter to the bottom of the table. We screwed the large adapter to the base and used the sticky strips for the connector piece. (this will look slightly different if using white LED lights, this is the adapter and set for the multi color set)
this is what ours looked like when secured and finished, we used a few twist ties to gather extra wires so they looked neat.
Step 10: We used velcro dots to secure the remote to the side. Again this is for the multi-color set, for the white set it is just like a lamp switch on the cord, and this is not needed.
this is what it looks like secured on the side, but removable for kids to play with.
Multi-Color LED table
What it looks like when off.
Our little princess playing with her new rainbow light table
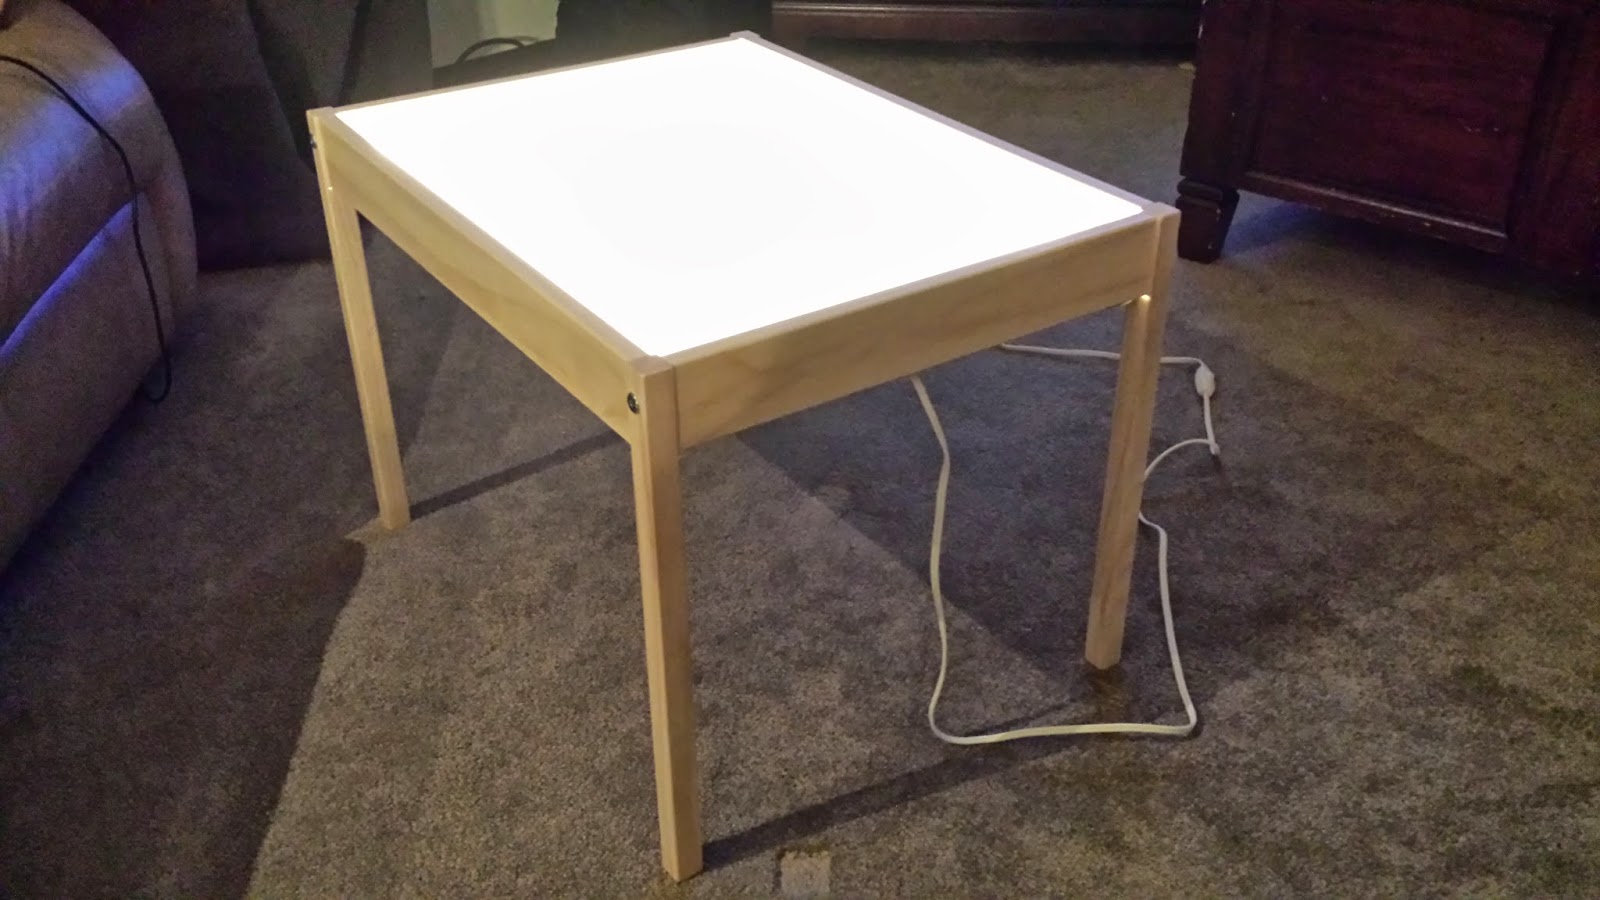
The far table is the white LED lights (photographed yellow but they are definitely not as yellow as shown)
ENJOY!!!
We have had fun playing all day with our new light table! Photographed below is the white LED light table.
Mixing colors with dyed vinegar and baking soda
Cheap manipulatives purchased at the dollar store!
Playing with Primary colors
Adalie, her cousin and her little brother Everett having a blast playing!
Did some coloring on the light table too!
Playing with plastic ice cubes
Demo of the light options of the multi-color led table! So much fun!
Hope you enjoyed this DIY Light Table - Ikea Hack.
Total cost for White Light Table: about $ 110
Total cost for Multi Color Light Table: $130
Total savings... roughly $280-$300+
Could possibly be made even cheaper with fluorescent lights but my husband loves the idea of LED and I am pleased!
UPDATE: We were featured on Buzzfeed! Check it out #18!!!